Enable SSO with Google Workspace (SAML 2.0)
Firezone supports Single Sign-On (SSO) using Google through the generic SAML 2.0 connector. This guide will walk you through how to configure the integration.
Step 1: Create a SAML connector
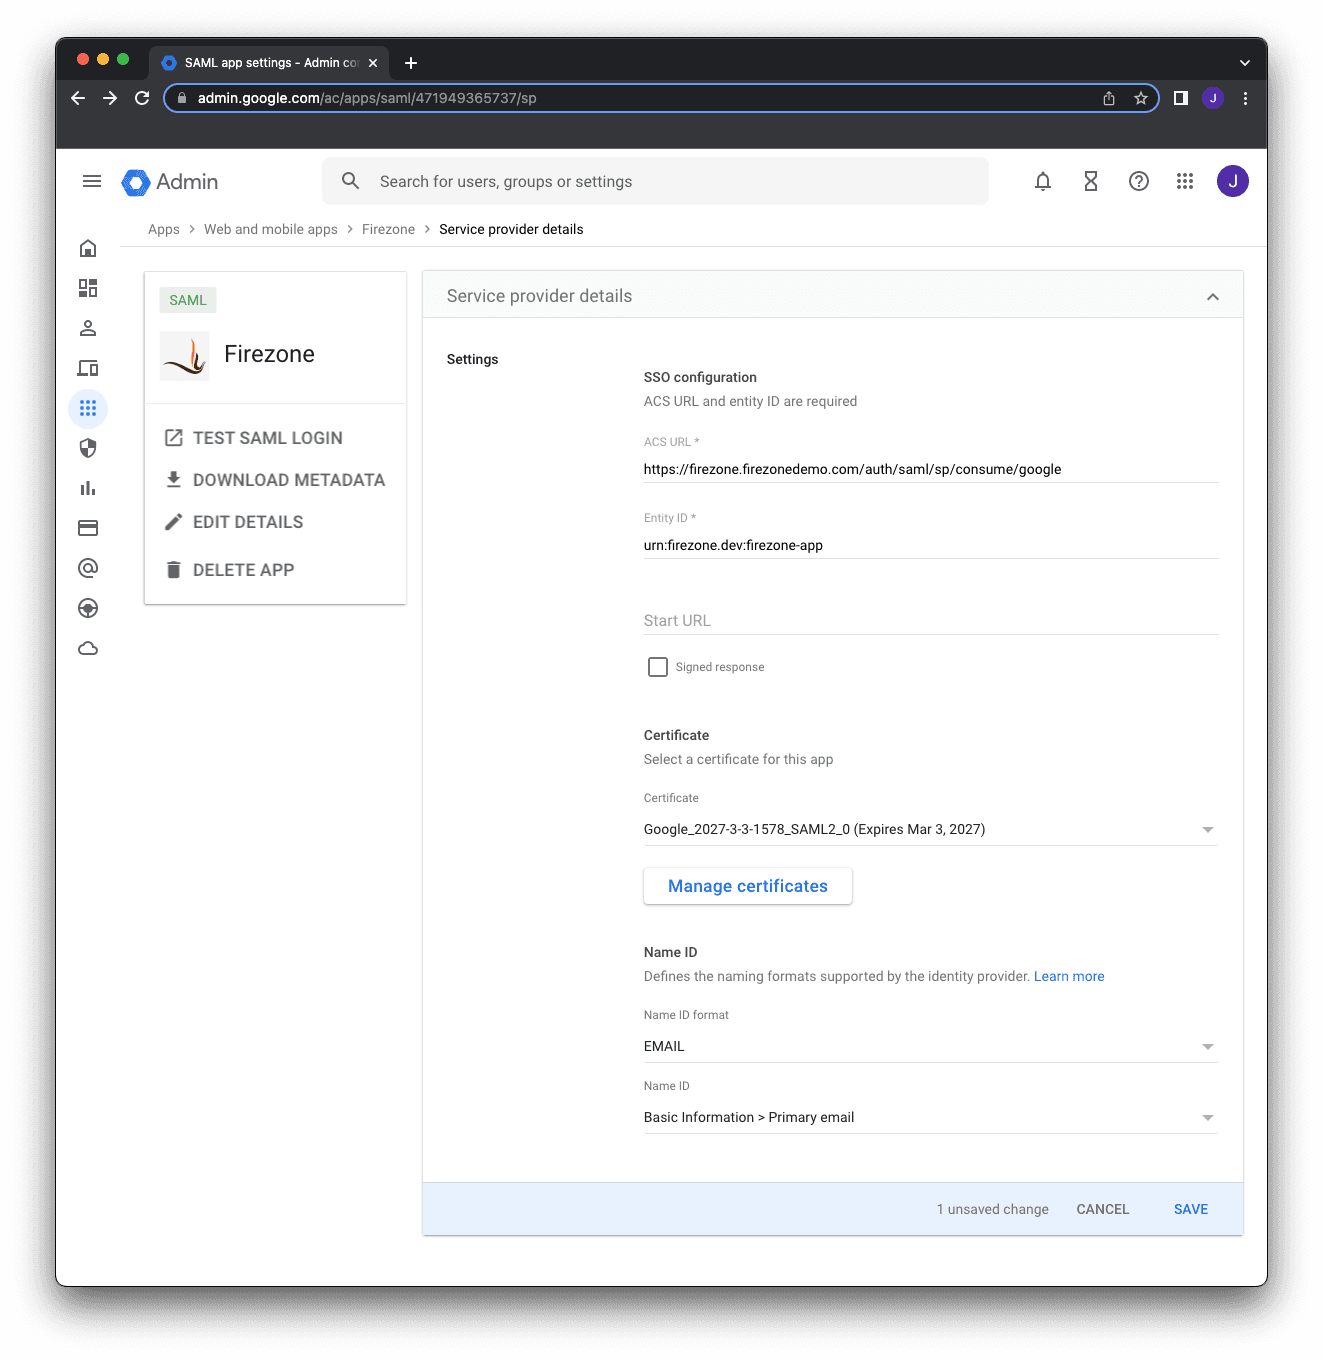
In the Google Workspace admin portal, create a new SAML app under the Application > Web and mobile apps tab. Use the following config values during setup:
| Setting | Value |
|---|---|
| App name | Firezone |
| App icon | save link as |
| ACS URL | This is your Firezone EXTERNAL_URL/auth/saml/sp/consume/:config_id (e.g., https://firezone.company.com/auth/saml/sp/consume/google). |
| Entity ID | This should be the same as your Firezone SAML_ENTITY_ID, defaults to urn:firezone.dev:firezone-app. |
| Signed response | Unchecked. |
| Name ID format | Unspecified |
| Name ID | Basic Information > Primary email |

Once complete, save the changes and download the SAML metadata document. You'll need to copy-paste the contents of this document into the Firezone portal in the next step.
Step 2: Add SAML identity provider to Firezone
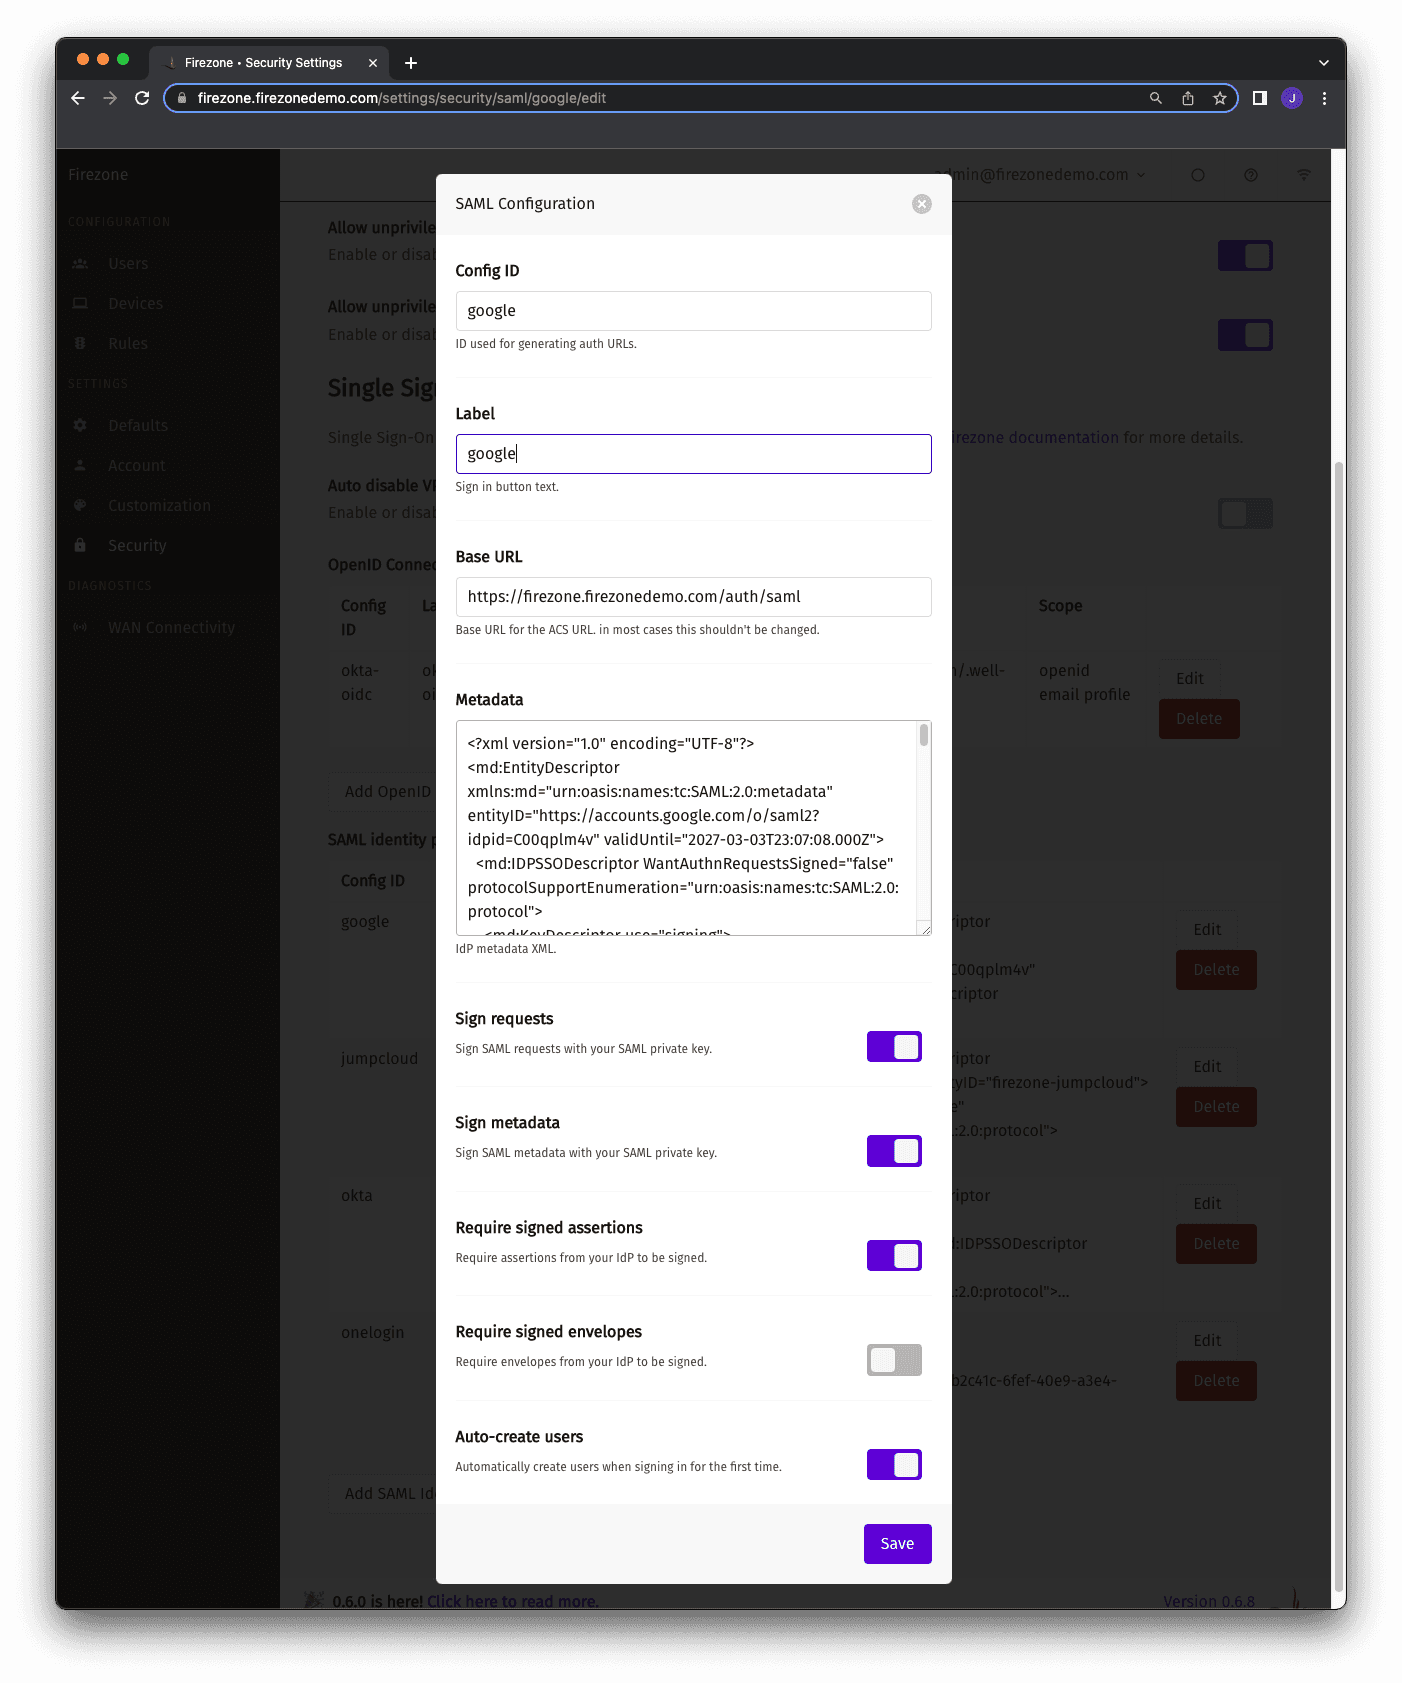
In the Firezone portal, add a SAML identity provider under the Security tab by filling out the following information:
| Setting | Value | Notes |
|---|---|---|
| Config ID | Firezone uses this value to construct endpoints required in the SAML authentication flow (e.g., receiving assertions, login requests). | |
| Label | Appears on the sign in button for authentication. | |
| Metadata | see note | Paste the contents of the SAML metadata document you downloaded in the previous step from Google. |
| Sign assertions | Checked. | |
| Sign metadata | Checked. | |
| Require signed assertions | Checked. | |
| Require signed envelopes | Unchecked. | |
| Auto create users | Default false | Enable this setting to automatically create users when signing in with this connector for the first time. Disable to manually create users. |

After saving the SAML config, you should see a Sign in with Google button on
your Firezone portal sign-in page.